

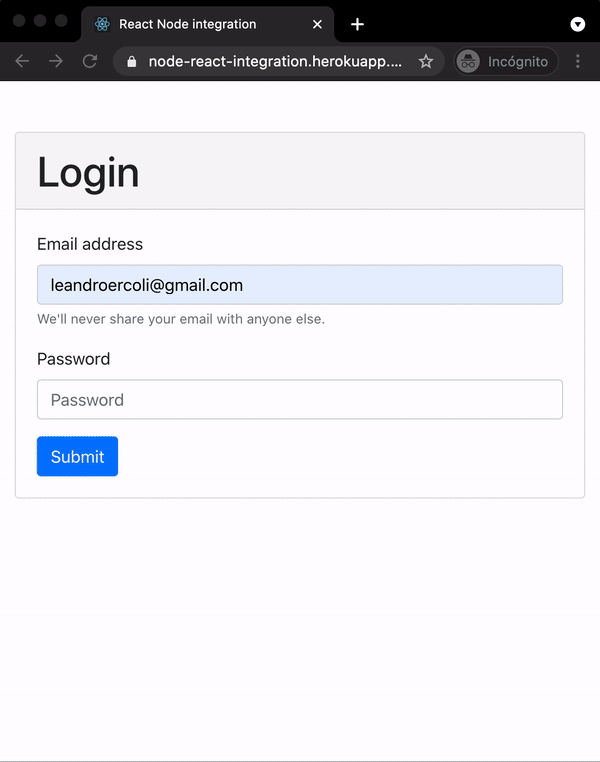
To go through the steps of connecting and running together a Node.js server with a React application, we will build a simple web application to search for artworks on the Art Institute of Chicago’s API. We will set up a basic login page, save a token on the browser to keep the user signed in, and search for artworks by a keyword on AIC’s database. A log out button on the homepage will remove the token from local storage and redirect the user to the login page.
Some knowledge and experience with Node.js, Express and React is required.
Back end
First, we will start by building the back end of the application. Download and install the latest version of Node.js. Create a new folder for this project and open a terminal window inside it. Run npm init to quickly create a package.json file, where we will list all the dependencies and their versions, as well as other metadata. This makes the project reproducible and eases collaboration between developers.
Pro tip: install nodemon globally to automatically restart the server on each file change.
We will also install some packages before starting to write code. Express is a framework built on top of Node.js, that simplifies its API and allows us to smoothly add middleware, routing and request handlers. Cors will deal with Cross-Origin Resource Sharing configuration. Dotenv enables us to separate secrets (like port numbers, credentials or tokens) from source code, storing this information in a .env file that should not be committed on git. Express-validator is a wrapper for validator.js that facilitates input sanitization and validation.
npm i express cors dotenv express-validatorThe entry point file to the back end of the application (set by property main in the package.json file) will initialize a server and listen for connections on the specified port. We should also add all middleware functions and bind routes to controllers when the server is launched.
require('dotenv').config(); // Load environment variables from .env file
const Server = require('./models/server');
const server = new Server();
server.listen();const express = require("express");
const cors = require("cors");
const path = require("path");
class Server {
constructor() {
this.app = express();
this.port = process.env.PORT; // Loaded from .env file
this.paths = {
auth: "/api/auth",
homepage: "/api/homepage",
};
this.middlewares();
this.routes();
}
middlewares() {
this.app.use(cors()); // Enable CORS
}
// Bind controllers to routes
routes() {
this.app.use(this.paths.auth, require("../routes/auth"));
this.app.use(this.paths.homepage, require("../routes/homepage"));
}
listen() {
this.app.listen(this.port, () => {
console.log("Server running on port: ", this.port);
});
}
}
module.exports = Server;const { Router } = require('express');
const router = Router();
const { check } = require('express-validator');
const { validationResult } = require('express-validator');
const { login } = require('../controllers/auth');
// validationResult: extracts the validation errors from a request and makes them available in a Result object.
const validateInput = ( req, res, next ) => {
const errors = validationResult(req);
if( !errors.isEmpty() ){
return res.status(400).json(errors);
}
next();
}
router.post('/login',[
check('email', 'Email is required').isEmail(),
check('password', 'Password is required').not().isEmpty(),
validateInput
],login );
module.exports = router;We will sanitize and validate input data through middleware functions on the request handler and, if no errors occur, send this values to the corresponding controller function. To keep this guide simple, the login controller will only allow the user to log in if the password entered is “1234”. Ideally, this information would be matched to a database entry.
const { response } = require("express");

const login = async (req, res = response) => {
  const { email, password } = req.body;

  // Ideally search the user in a database,
  // throw an error if not found.
  if (password !== "1234") {
    return res.status(400).json({
      msg: "User / Password are incorrect",
    });
  }

  res.json({
    name: "Test User",
    token: "A JWT token to keep the user logged in.",
    msg: "Successful login",
  });
};

module.exports = {
  login,
};This should be enough to log in and redirect the user to the homepage. We will check if there’s a token saved on the browser each time the application loads.
API Integration
Since AIC’s API requires no authorization protocol to request data, the controller will receive a keyword from the front end as a URL parameter and execute a request to the API for artworks that match the search term/s. To communicate with the API, we will install cross-fetch library and execute a GET request with the appropriate parameters.
The API response will be parsed as a JSON object, sent to the front end and turned into rendered UI components on the browser.
const fetch = require("cross-fetch");
const { response } = require("express");
const AIC_URL = "https://api.artic.edu/api/v1/artworks/search?q=";

const getArtworks = async (req, res = response) => {
  const { keyword } = req.params;

  try {
    const resp = await fetch(
      `${AIC_URL}${keyword}&limit=15&fields=id,title,image_id,date_display,artist_display,place_of_origin,medium_display`,
      {
        method: "GET",
        headers: {
          "Content-Type": "application/json",
        },
      }
    );

    if (resp.status >= 400) {
      throw new Error("Bad response from server");
    }

    const { data = [] } = await resp.json();
    const dataWithUrls = data.map((image) => ({
      ...image,
      image_url: `https://www.artic.edu/iiif/2/${image.image_id}/full/843,/0/default.jpg`,
    }));

    res.json(dataWithUrls);
  } catch (err) {
    console.error(err);
  }
};

module.exports = {
  getArtworks,
};Front end
We will group all front end (React) code into a new folder at root level. It will pick up the same .gitignore rules we defined for the Node server (if you haven’t yet, git init will create a new Git repository). Go into the folder created and start a React project with Create React App.
npx create-react-app node-reactSince each part of the application will be running on separate ports on development, we need to proxy API requests coming from the front end. To do this, if the back end server runs on port 8080, add this line in the client’s package.json: “proxy”: “http://localhost:8080”
Now, all unknown requests to relative paths from the front end will be sent to the back end server running on port 8080. Note that this is only valid in development and will have no effect in production.
Let’s install Bootstrap and use its components for React to build a basic UI to interact with the back end. On the entry point component to the application, we will check for a token on local storage to know if the user has already signed in. On log out, we will remove the token from the browser’s storage.
import React, { useEffect, useState } from "react";
import Login from "./components/login";
import Homepage from "./components/homepage";

function App() {
  const [isUserSignedIn, setIsUserSignedIn] = useState(false);
  useEffect(() => {
    if (localStorage.getItem("token")) setIsUserSignedIn(true);
    else setIsUserSignedIn(false);
  }, []);

  const onLoginSuccessful = () => {
    setIsUserSignedIn(true);
  };

  const onLogout = () => {
    localStorage.removeItem("name");
    localStorage.removeItem("token");
    setIsUserSignedIn(false);
  };

  return (
    (isUserSignedIn && <Homepage onLogout={onLogout} />) || (
      <Login onLoginSuccessful={onLoginSuccessful} />
    )
  );
}

export default App;To trigger an AIC search for artworks we will execute requests to the back end using relative paths. As the application scales, keep all API functions in a folder separated from UI components.
export async function login({ email, password }) {
  return await fetch("/api/auth/login", {
    method: "POST",
    body: JSON.stringify({ email, password }),
    headers: { "Content-Type": "application/json" },
  })
    .then((response) => {
      // If request is not successful, display error message
      if (!response.ok) {
        throw new Error("HTTP status " + response.status);
      }

      return response.json();
    })
    .catch((err) => {
      console.log(err);
    });
}

export async function searchArtworks({ keyword }) {
  return await fetch(`/api/homepage/getArtworks/${keyword}`, {
    method: "GET",
    headers: { "Content-Type": "application/json" },
  })
    .then((response) => {
      // If request is not successful, display error message
      if (!response.ok) {
        throw new Error("HTTP status " + response.status);
      }

      return response.json();
    })
    .catch((err) => {
      console.log(err);
    });
}We can now perform an API request to the Node.js server from a React UI component. For example, to look for artworks based on a keyword:
const artworks = await searchArtworks({ keyword });import React, { useState } from "react";
import { Container, Row, Form, Button, InputGroup } from "react-bootstrap";
import { searchArtworks } from "../../api";
function Homepage() {
const [keyword, setKeyword] = useState("");
const [artworks, setArtworks] = useState([]);
const onChangeKeyword = (event) => {
setKeyword(event.target.value);
};
const onSearchArtworks = async (event) => {
event.preventDefault();
const artworks = await searchArtworks({ keyword });
setArtworks(artworks);
};
return (
<Container fluid>
<Row noGutters>
<Form className="w-100 mb-5" onSubmit={onSearchArtworks}>
<InputGroup>
<Form.Control
type="text"
placeholder="e.g. Monet, O'Keeffe, Ancient Greek..."
onChange={onChangeKeyword}
value={keyword}
/>
<InputGroup.Prepend>
<Button
variant="outline-primary"
disabled={!keyword}
type="submit"
>
Search artworks
</Button>
</InputGroup.Prepend>
</InputGroup>
</Form>
</Row>
</Container>
);
}
export default Homepage;Concurrently
Developing and running the front and back end at the same time gets easier if we use npm’s package concurrently: we can run multiple commands concurrently and automatically reload both servers with every change.
npm i -D concurrentlyGo to the root package.json file and add the following scripts. Make sure to set the value of the --prefix option to the right folder in your file structure.
"scripts": {
  "start": "node app",
  "server": "nodemon",
  "client": "npm start --prefix client",
  "dev": "concurrently \"npm run server\" \"npm run client\"",
  "build": "npm run build --prefix client"
}Now we can run both applications with a single command: npm run dev
Deployment
Before deploying the application to a hosting service, we need to build the client application and tell the back end how to load it.
Run npm run build to bundle, minify and optimize all front end code into HTML, CSS and JavaScript files in thebuild folder. The entire React application will serve through the entry pointclient/build/index.html. This file has to be picked up by the back end server to serve the front end application: import the path module and add the next line to the Server class constructor, making sure to specify the relative path to the build folder that matches your project’s file structure.
this.app.use(express.static(
    path.join(__dirname,“../client/build”)));
We will also add a new request handler on the Server class to catch all requests that do not match any route and send back React’s index.html file.
const express = require("express");
const cors = require("cors");
const path = require("path");

class Server {
  constructor() {
    this.app = express();
    this.port = process.env.PORT;
    this.paths = {
      auth: "/api/auth",
      homepage: "/api/homepage",
    };

    this.middlewares();
    this.routes();
  }

  middlewares() {
    this.app.use(cors());
    this.app.use(express.json());

    // Pick up React index.html file
    this.app.use(
      express.static(path.join(__dirname, "../client/build"))
    );
  }

  // Bind controllers to routes
  routes() {
    this.app.use(this.paths.auth, require("../routes/auth"));
    this.app.use(this.paths.homepage, require("../routes/homepage"));
    // Catch all requests that don't match any route
    this.app.get("*", (req, res) => {
      res.sendFile(
        path.join(__dirname, "../client/build/index.html")
      );
    });
  }

  listen() {
    this.app.listen(this.port, () => {
      console.log("Server running on port: ", this.port);
    });
  }
}

module.exports = Server;The application is now production ready. If you choose to deploy your application to Heroku, start by signing up, going to the dashboard and creating a new app. You can then install Heroku CLI to manage your application from the terminal or link your GitHub repository for automatic deploys. Whichever method you choose to deploy make sure Node’s package.json file is at the root of the directory structure.
When you’re ready to deploy your application, make sure all your changes are committed and push them to the deployment branch.
Check out the full code for this application or see it in action.